Monday, July 9, 2012

Summer Stress

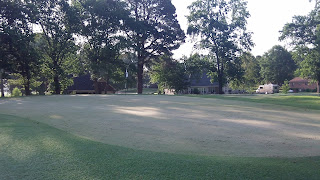
Here in Senatobia it was very hot for a number of weeks.  To add to the the heat, we had not received any measurable rainfall for over a month.  The heat and drought stress was beginning to take its toll on the course. Our irrigation system works well, but is limited in coverage.  Without a rain event every couple weeks at the least, grass begins to turn brown and die in the areas without irrigation.

The greens have good irrigation coverage, but no amount of irrigation water will take the place of a good rain shower.  The greens were beginning to show signs of drought and heat stress a few weeks ago.  I was irrigating as much as possible, but there were still areas of the greens that remained dry.  I decided to punch some holes into the surface of the greens to provide channels for air and water movement.

We first used needle tines.  These tines worked great and I liked the results, but they kept breaking.  We used 40 tines on four greens.... a waste of time and money with those tines.  I needed another option.


 Here are the results of the needle tines:


I decided to try some 0.25" solid tines instead of the needle tines.  These tines were much stronger and we were able to finish the rest of the greens without a single failure.

Solid 0.25" Tines:

The big questions is... Did I get the results I was after?  Yes, I think that the greens responded great to the solid tine aeification.  We had four days of 100+ degree weather with a low humidity and southern winds.  The greens took water easily and I had very few dry spots.  The other concern I had and I know golfers had... Was there a negative effect on ball roll?  Yes, the greens were bumpy for about 5 days.  I did notice that the ball still rolled true, but it did bounce a little on the way to the hole.  I think that putting was only hindered for those few days and I did not notice any drop in green speed.  I think that is a small price to pay for the added benefits of air and water movement into the the soil profile.


Monday, June 11, 2012

New Flags and Pin Sheets

Starting about 4 years ago, Back Acres went to a Red, White, and Blue flag system for pin locations on the green.  They colors represented front, middle, and back respectively.  This system worked well and served its purpose, but it created a few problems.  The main issue is the fact that just about everybody has a different opinion on what the different locations should be.  Sometimes the pin would be in a location on the green that could be classified two different ways depending on how your view was.  Also, because of no standardization and the extreme slopes on most of the greens, even distribution of front, middle, and back through out the 18 holes was almost impossible.

The old flag situation also created some headaches from a maintenance standpoint.  Because of a number of different people doing course set-up, it was hard to keep track of the previous pin location.  This meant that in any given week, the pin might be repeatedly move back to the same general locations.  That is not good for the health of the greens.  The wear caused by the golfers needs to be evenly distributed over the entire surface to help prevent compaction and turf wear.  Also, most people want a variety of different pin location to make it fun and challenging.

Last year, as the new superintendent at Back Acres, I noticed these issues.  I decided that a new pin location system could easily be developed and implemented.  Because of my work experience at high end clubs, I knew that a pin sheet marked with different pin locations would work best.  The greens are mostly odd shapes, so they would have to be represented on the pin sheet true to shape for it to work best.  I tried a few methods to get an accurate representation of the shapes, but found that hand drawing them would be the easiest.  I used Google Earth's overhead views to help get the shape and positioning of the greens.  After all the greens were drawn, I divided each one into six sections.  These sections were label 1-6 and the locations were evenly distributed so each number would have 6 front, middle, and back locations.


Along with replacing all the old flags with new white flags, we started using the new pin sheets.  The sheets are printed front and back on a laminated sheet of paper and are available to golfers when they check in at the pro shop.  The pin location for the day is also passed along to the golfer so they know which location to refer to on the sheet.  So far it has been working great and, as an added bonus, we can finish setting pins faster because there is no need to switch flags.  I think over time the greens will benefit from less wear and players will have more fun.

Tuesday, June 5, 2012

Busy day after the rain

Some people cringe when they see or hear of us verticutting, or "scratching" as some call it.  They believe that more damage is done, and no good comes from the process.  I have been told it is that we preform this operation to often.  In the past vertical mowing might have been done once or twice every few months.  I try to explain that many of the methods done in the past are outdated or no longer accepted as standard procedures.  The greens are maintained at heights far lower than just ten years ago, and green speed expectations are much higher.   Because of this, different cultural practices must be utilized to achieve to ball roll desired.


The main reason to vertical mow is thatch reduction.  Thatch is a layer of dead grass and plant material between the canopy of the turf and the surface to the soil.  Excess thatch causes the greens to become soft and spongy which will cause the ball to roll slow and bounce.  Thatch can also cause dry spots because water can not infiltrate the turf and soak into the soil.  The worse problem with thatch is it can harbor pathogens which can cause disease if conditions are right.


Today we did the work that is usually scheduled for Monday.  First thing this morning we started vertical mowing the greens, otherwise known as verticutting.  The direction of cut was 10-4 if looking at the green.  We  went up and down the same pass, effectively double cutting the green, but all the passes are at the same angle.

Our process is to vertical mow the greens and then add a thin layer of sand called topdressing.


    After the sand is applied we sweep or brush it into the canopy. The sand also helps to reduce thatch.  Another bonus of the sand is the fact that it smooths and firms the surface.  A smooth and firm putting surface is the objective.


The sand is noticeable for a few days, but does not affect the ball roll in any negative way.


After a few days the greens are completely healed and ready to be done again.


Monday, June 4, 2012

The start of the Back Acres Blog

Hello to everyone!  My name is Rory Branson, I am the superintendent of Back Acres Country Club located in Senatobia, Mississippi.  We are located about a hour south of Memphis, Tennessee.  Back Acres is a private 18 hole golf course that was started back in 1961.  We have a very supportive membership that cares dearly about this piece of land.

The purpose of this blog is the help keep the membership and any others who might be interested up to date about the "goings on" with regards to the maintenance of the course.  I will attempt to post here as often as possible.  In my posts I will try to explain what has been done to the course and why.  I will also try to add pictures of projects and views from around the golf course.

I hope that I can keep all those interested informed and will gladly answers any questions or comments.